 Here is a close-up picture of the clasp which was handmade by Jennifer Kramer of The Blue Dress (www.thebluedress.com):
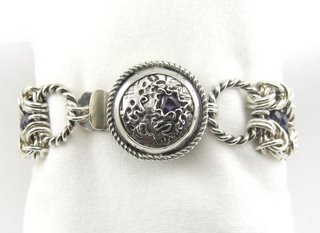
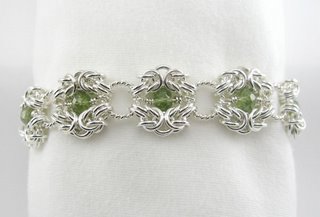
and Verde Flores Bracelet
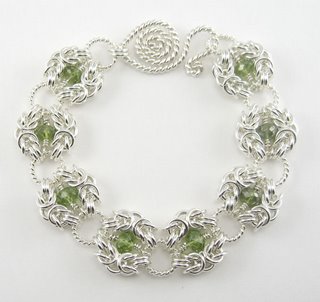
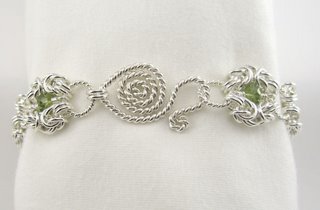
And here's a close-up picture of the clasp (handmade by me):
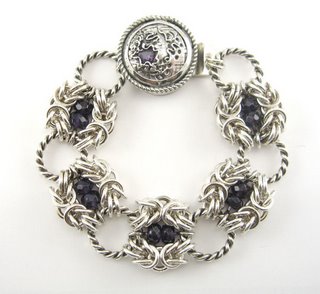
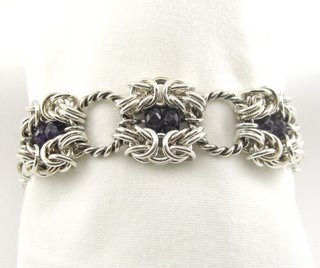
Both of these bracelets are examples of the Romanov chain maille weave. Essentially, the Romanov weave consists of two sections of Byzantine weave connected by larger jumprings. The bracelets have several different components which make each piece unique. The Royal Decree Bracelet was made with larger sterling silver wire and rings, 16g/4.5mm, and the Verde Flores was made with slightly smaller stelring silver wire and rings, 18g/3.5mm.
I learned several new skills during the creation of these pieces. Each jumpring has been hand-coiled and hand-sawn by me. I was able to figure out how to make the coils using my electric drill, which cut down trememdously on the winding time. Up until this point I have painstakenly wound the coils by hand, taking lots of time and creating tons of blisters and cuts on my hands. But I'm thrilled to be able to wind the coils with my drill until I purchase a jumpringer system. After I coiled the wire (I had so much fun, I used several ozs of wire and ended up with a couple of feet of coils!!!) its time to cut the rings, which I do by using a jeweler's saw and hand cutting each ring from the coil. This is another time consuming process, but, very satisfying, and results in much nicer jumprings than if I cut them with flush cutters. After cutting the rings I put them in my tumbler with mixed steel shot, give them a good tumble for about 20-30 minutes, seperate the rings from the shot and let them dry, and they're ready to go to be woven into whatever I please.
Another skill I learned was to make twisted-wire jumprings. The process is essentially the same as cutting regular jumprings, but, one starts with twisted wire. Twisted wire can be purchased pre-made, but, I wanted to make the wire myself. To do this I cut a several foot length of wire, double it, put the ends into my drill, and hold the other end out taught with my pliers, turn the drill on and let it twist until the length breaks at the chuck, and voila! A length of twisted wire. Once the wire is twisted, it needs to be annealled, or, in other words, the wire needs to be heated until soft again. Every time one handles wire it causes the wire to harded, ultimately resulting in the wire becoming so hard and brittle that it can break. So, to continue working with the wire one anneals it. I anneal the wire by heating it with a torch until it glows a dull red. Then I let it cool, make my jumprings and pickle them to remove any firescale. I tumble the rings to remove any burrs and to shine up that beautiful silver.
The last skill that I learned during creating these pieces is how to apply patina to the piece. Patina is the oxidation, or, the tarnish that naturally occurs to silver (and other metals). One can speed up this process by applying a patina. I chose the fun route of oxidizing my pieces using hard-boiled eggs. Hard-boiled eggs you ask?? Yes. Hard boil your eggs, while they are still warm place them in a quart size ziploc bag with your piece (which should be cleaned and placed on a crumpled paper towel), then close the bag and smash the eggs. Make sure not to get any egg on your piece or that portion won't oxidize. Leave the piece for 10-15 minutes, checking the darkening process to achieve the level of darkness you prefer. Take the piece out, wash and dry and then its time to remove portions of the patina. One can remove patina many different ways, and I chose to use one of my manicure buffing blocks to gently buff away the patina. After the piece looks the way I want it, I plop it in the tumbler to shine and harden the silver.
These two bracelets were immensely satisfying to make and I look forward to creating more pieces with the new skills I learned. Huge thank yous go to Jennifer Kramer of The Blue Dress for all the tips and guidance she gave me during this process.
The bracelets, of course, are for sale on my website, www.jennifercasady.com

4 comments:
Beautiful work on these!
-Janine
Thank you Janine!
This is a magical blog!
There's so much wonderful information here. It's a great resource, plus you've introduced me to some new trend of bracelet.
Nice work Jennifer..
I was searching for this kind of Bracelet for my girlfriend. She will definitely like it..
Thanks..
Post a Comment